Whether you are running VMware Cloud Foundation (VCF) or standalone vRealize LifeCycle Manager instance managing your vRealize products, the following management pack for vRealize Operations will help give a health monitoring dashboard to your solutions. You can monitor capacity growth over time as well as certificate monitoring.
You can obtain the management pack couple of different ways. One way is through the VMware Marketplace, download the pack and upload to the vRSLCM via SCP.
Always check the Marketplace carefully for management pack versions, publisher and release notes.
The other method to access the Marketplace through the vRealize Lifecycle Manager
In the lab I downloaded the pack and uploaded it to the following location on the appliance
Once uploaded, jump into the vRSLCM appliance, you can see here in the Environment section it shows no information available for Health and the ‘i’ icon explains what we need to do.
From the vROps Environment, click ‘View Details’, once inside the vROps environment, click on the ellipses and you will a pre-built action to install the SDDC Management Pack.
Once prompted I placed /data/marketplace and click Discover, this found the file I downloaded and uploaded. Click Submit
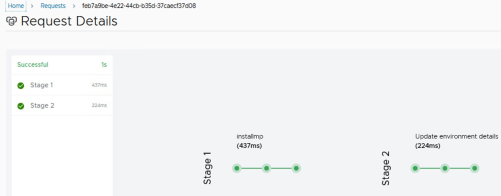
The Request page updates to Successfully deployed
After about 15-20 minutes, you will find health is Green now.
What to do next? Check out the newly installed dashboards in vROps.
Running VMware NSX-T 3.2.1 on a clean install, no previous upgrade. Home lab is not sitting around doing much other than whatever idle tasks might be going on with the appliance. I decided to log in and BAM! The system section was not loading
Error code: 513002
Under System>>Configuration the following error would appear
I was able to navigate to check the basic health of my managers, and checked ‘View Details’ for each one; everything was up, all green, and space utilization looked good.
From the VM console logged in as admin, I tried ‘restart services controller ‘and no success.
While troubleshooting and looking for KBs and forums on the web, when running ‘get managers’ from admin console, one of my managers was in Standby, but then there was some intermittent activity where all went into Standby for a brief moment.
Not just this happening but my Appliances GUI was also now switching between ‘Healthy’ & Degraded.
Next step was to reboot one appliance at a time, which did not seem to fix the issue.
After taking a break and happen to be doing something else in the home lab, I had to shut down and restart the vCenter, well I happen to check later on in the day and NSX was able to load with no problems.
I’m going to keep this up in the event the issue comes around, I plan on updating.
As a disclaimer, Synology was gracious in providing a DS1621+ with 10GB PCI adaptor to test out.
For all consumers running a Synology NAS at home with virtual infrastructure or to the business requiring an easy-to-use method to backup to a private cloud (your own datacenter). The Active Backup for Business is a great way to get started with creating some type of Disaster Recovery & protection for systems. For my home lab, I run a VM infrastructure at home on some SuperMicro E300 servers with Ubiquiti gear. Once you install Active Backup for Business on DSM and go through the activation process (this part requires a Synology.com account). There was no issue with registering both of my NAS models under the same account.
Synology DS1621+ running DSM 7.0.1-42218
Active Backup for Business 2.3.0.-12153
VMware vCenter 7.0.3 19480866 (U3d)
VMware ESXi 7.0.3 19482537
Synology joined to home AD domain
Windows 10 & Windows 11
Ubiquiti networking gear.
Once Active Backup for Business is installed, from the main launch screen We want to add a VMware environment by clicking ‘Virtual Machine’
You do have the option to add VMware vSphere or Microsoft Hyper-V, for today we will remain on vSphere & click ‘Manage Hypervsior’
Click ‘Add’ and populate with your vCenter environment, I was able to authenticate with a domain account.
Once connected it should give a Success status and then finally should talk to the vCenter.
Now Active Backup can read all my hosts and the individual VMs running on the hosts at the time. Also during this time, I did do a vMotion, once it completed, I clicked refresh and the screen reflected the change.
From here you can click to highlight a single VM, or hold down ‘Ctrl’ key and use the mouse to select multiple objects and then click ‘Create Task’ **Please note that if you have VM Templates when you select the object, the ‘Create Task’ button will be greyed out. The next screen will bring up a wizard-like interface, you can create a custom Task Name and then the option to select VM objects. I also noticed that the Template initially discovered does not appear in this list. There is a little ‘i’ icon next to some VMs which gives some insight into VMTools awareness and functionality.
The next screen will be to select a landing location, I will select the default folder that Active Backup created in my ‘Shared Folders’
The next step will be backup destination settings, I will proceed with enabling ‘compression’ but no encryption. I will leave the defaults, however please share experiences with other options.
The next screen will check to ensure all services are successful on the VMs and click ‘Next’ and then you are presented with an option to ‘Schedule Backup Task’ I will keep Manual. Depending on your needs and what industry you are in, that industry may have compliances on data retention, Tax Office? Healthcare? Legal? these are just a few of the professionss that should ensure retention and backup is set.
The next screen will be specifying permissions for Restores and finally confirm Task summary. You are prompted to take a backup, I selected Yes.
Various ways of monitoring activity for backing up
Active Backup takes a snapshot of the VM
The object view of the VM displays a checkmark now and gives Task status information for each object.
The Overview gives a clean dashboard of activities
An active status
My backup for the 3 VMS took about 38 minutes. This is going over 10GB network, I feel performance can be tuned to be better. My initial backup was showing 280GB in my Shared Folder. I have other things inside the home network I’m working through.
Active Backup did great with deleting snapshots from my VM after backups were completed.
My other thought was, why backup VMs to the same storage array my iSCSI storage is on? Well, that is when Synology’s Snapshot Replication tool came in handy, I created a replication between my backup target NAS over to another Synology NAS (DS 1515+).
Performed a sync between nasstore02 (source) and nasstore01 (destination), Ran a quick Test Failover, and then performed a ‘Switchover’ to make my new destination the ‘active’.
On my new destination NAS (nasstore01) I was able to go to the ‘Storage’ section in Active Backup and Relink a shared folder containing my replicated backups.
Now let’s restore from our new destination of Active Backup, highlighting the desired VM, click ‘Restore’ I followed through the prompts and left all the settings default, and in advance I renamed my original VM so that I can do a full restore.
Monitoring status, I performed a ‘Full Restore’ and by the way, this is coming from a NAS with only 1GB and I have port bonding configured (4 1GB links) with LACP on the switch. The restore was successful, took about 18 minutes
and my VM was restored back to my vCenter from my other Synology and I was able to log in with preserved IP.
Along with the Active Backup application, there is a web interface to the tool that allows file browsing for restore and downloads, this can be accessed from the Applications menu in DSM.
Overall I’m pleased with the flexibility and feature sets of the DS1616+ and more importantly Synology’s software that was able to work with a slightly older Synology NAS with different network backing.
If there is anything you are curious about or would like to see, please do not hesitate to reach out.
There are a lots of tools in the shed when it comes to overseeing the health of your VMware software-defined datacenter. One of those tools, Skyline, is a free SaaS offering on console.cloud.com when you have an active ELA or a Success 360 customer (Premier Support).
From VMware http://www.customerconnect.vmware.com you can go out to Downloads and obtain the VMware Skyline Collector 3.4. This will download an OVA file to deploy in your virtual environment.
I will be fast-forwarding through most assuming the audience is familiar with deploying Virtual Machines.
Some recommendations I would give is prior to deploying in any environment, come up with is reserve an IP, hostname before deploying the appliance. Skyline Collector 3.4 User Guide (PDF)
Choose to leave default name or create a custom vSphere object name (prefer making the name the same as your reserved hostname), everyone’s standard will be different. Click Next.
The next step, select cluster/compute resource the virtual machine will be deployed on.
Review the details of the appliance, the next screen will be EULA (End User License Agreement). Click Next
Select the storage for the appliance, click Next.
Select the desired network, click Next.
For the next step, create a custom ‘root’ account password, assign the networking, domain and DNS related entries to complete customizing the template. Once that is completed, click Finish
In the event you lose or forget the root password for the appliance or the ‘admin’ account, visit the following KB: https://kb.vmware.com/s/article/52652
Initially I got thrown the following error, all i did was refresh my session and run through the installation setup a little quicker, there were some delays while creating the post.
Once the VM is created, you will need to power it on. Once it’s full booted up and network services are on. You should be able to reach the appliance by its hostname.
The default password for the ‘admin’ account is ‘default‘. Once you log in, you will be prompted to change the password immediately and then to log back in.
Once you log in with the newly changed password a setup wizard will begin the registration of the collector to Skyline Advisor and option to configure endpoints. There are some additional prerequisites that are recommended to perform prior to complete next steps, such as creating the suggested Read-Only accounts to be used for configuring the endpoints.
From the beginning 1. Test & Save the hostname configuration and configuring a proxy (optional), click ‘Continue’.
Next is the CEIP, click ‘Continue’,
As we are going through the wizard, step 3. Collector Registration, will require signing onto the console.cloud.vmware.com and from the Cloud Console home select ‘Skyline Advisor’
In our example, there is an existing Skyline under a cloud org and we will be adding an additional collector. Click ‘Add Collector’
You will now be presented with an option to Copy/Paste a generated token
Go back to the Collector configuration wizard, paste the token and click ‘Register Collector’
Create a ‘Friendly Name’ the collector will be identified as in Skyline Advisor, it’s recommended if you are deploying collectors are several sites to create names easily identified.
Enable Auto-Upgrade is off by default, I’m turning it on, this is a service that will not disrupt anything in the environment.
Starting with adding credentials, the following example is an Active Directory account that is configured with a Read Only role set in Global Permissions on the vCenter.
You may proceed with configuring additional products into Skyline. Fast forward through all the solutions, once completed, the Endpoints may come up red for a moment or show green immediatly.
If you go back to the VMware Cloud Console, the final step would be to click ‘Complete Setup’ This should then take you back to the Skyline Advisor and the number of collectors should increase by one.
I hope this document was helpful and there is plenty more of information and details pertaining to Skyline.
VMware’s Log Insight tool part of the vRealize suite is an excellent logging solution backed with analytics. Log Insight provides a marketplace-like feature called ‘Content Packs’ that has a variety of supported plug-ins that are pre-built dashboards for other vendor systems. One of those I wanted to dive in today is the install & configure of the Active Directory Content Pack in addition to the Log Insight agent on my home lab Active Directory server.
Installing Log Insight agent on Windows Server 2016 Datacenter
The agent can be downloaded from within the Log Insight interface. From the home page click on ‘Administration’ and then over to ‘Agents’ on the left pane.
On the bottom of the page there is a download link for the agent
You will find agents for the following supported OSs
In our exercise we will download the Windows MSI file. Launch the installer and there is minimal configuration performed, the most important part is either using hostname or IP for for the Log Insight server.
*The error I’m researching, this seemed to be the only system, checked time clock, not sure if this a time or speed notification, data was flowing in pretty fast.
Once the installation is complete, Log Insight Agents console should immediately display the machine.
Configuring the Log Insight Agent
From the ‘Agent’ menu, go to ‘Agent Configuration’, as an example we will create a Windows Event Log configuration for logging.
Create a unique name (no spaces) of the log, in our case we will call it ‘WinApplication’ for the ‘Application’ events in Event Viewer on the server.
Once that is completed you may proceed for other ones, and in the end should look something like this.
Once the agents are configured, these loggings will begin for all agents detected in LogInsight.
You can click on the hyperlink-enabled name of the agent and it will take you straight to the ‘Interactive Analysis’
The Interactive Analysis is your tool to filter through logs.
Installing the Active Directory Content Pack
From the Log Insight home page, go to ‘Content Packs’
The Log Insight Marketplace appears and in there look for ‘Microsoft – Active Directory’, click once, review/agree terms, check the box and click ‘Install’
The install is instant and you should be prompted with ‘Setup Instructions’
By installing the Log Insight agent, we have fullfilled some of the prerequistes already
From the ‘Agents’ menu, find the and copy the template that is now installed
Here you can name the new group and click ‘Copy’
Some pre-populated configurations will load from the copied template, create a filter, in my example, I selected the hostname of my AD server. Ensure the hostname matches what the name from the agent is, this should bring the found agent down below. Click ‘Save Configuration’
After that is done, you can go back to Interactive Analysis and play around with filters, in my test, I simply reloaded DNS Zones and created a new record
This was something really simple and straight forward, there are several more customizations you can leverage with Log Insight, features for alerting via e-mail for particular events you want to capture and more.